Showing posts with label sewing. Show all posts

Friday, July 23, 2010

Ben Backstay was our bo'sun...

and I am a very merry girl!
Remember this fabric?

It is now a sailor skirt. I loved HH's suggestion of a sailor dress but I had 4 one yard pieces of this fabric and wasn't sure if I could weasel a dress out of it. I also don't know if it is a color I want near my face. So I compromised.

I used Built By Wendy's A line skirt pattern from Sew U as my base and the Sailor in Bermuda tutorial on BurdaStyle. I rotated the darts on the skirt front out into the waistline. Not sure if that is how I was supposed to do it but that is what I did so I could put in the sailor front. It wasn't all that difficult but it did require some thought as there are a few different pieces and the tutorial just gives you the basic pattern shapes and no instruction as to how to put them all together. You wind up with a good amount of layers in the side seams. I also did not line this skirt (sorry, mom) as I wanted it to be a summer skirt and I was dealing with enough pattern pieces already. I also hate inserting linings. I think I may try out the vintage route and not line my garments but make myself a little trousseau of slips to wear under it all. Easier sewing all around, n'est-ce pas?
An attempt at a close up for more detail


I was really surprised at how well Berteau behaved for the photos. He looks good in all the pictures. I on the other hand look only so so. On the walk back to the house he decided to he wanted to be a pin up model.

This is actually kind of the image I see in my head every time I walk him. Except there is more wrappage of the leash, more falling over, and lots more skirt going up.

and then he sat on my foot. He likes doing this for some reason.

When I got home I decided this outfit needed some jewelry and remembered that I had this fish necklace.

I had a great idea for the image I wanted but trying to take pictures of your self that involve close ups and a more specific idea don't really work.

This is more of what I had in mind except with the fish being the only thing in focus and everything else blurred out. Instead I just got a picture of my cleavage. I will be the art director and model if someone else could be the photographer. Luckily I know lots of photographers. Unfortunately that would involve even less regular blogging on my part. Oh well! off to make friends with my tripod!

Friday, July 2, 2010

Bias Cut


I cut my own bias tape. I wanted to make sure I had enough for my project because I didn't want to have to stop in the middle and cut and piece more together. Then I made even more because there wasn't THAT much of the fabric left and I was doing it anyway.

I may have gone overboard.

Thursday, June 24, 2010

knowing your weaknesses...

I needed a case for my phone (since it was stupidly designed with the camera lens sticking out instead of laying flush). I really didn't want one of those ugly rubber band things. I found a few on etsy that I liked but couldn't see myself spending the $50 + shipping for the leather one that I liked the most.

I used a animal skin faux leather that I have had in my stash for a while (I made a tote and a portfolio case out of it in college and have plans for a handbag and an entire set of matching luggage.), some scraps from my fall floral shirt and a button from my button box. I ripped and re-did this like 3 times before I had to give up for the day. After sleeping on it I realized that I was going about it all wrong. On something this small you can't stitch leather right sides together and then turn. The seam allowance is too bulky. I forgot about that. I was able to salvage what I had and I simply topstitched it with the wrong sides together. No flipping right side out necessary.

I like the end result but I am never doing that again. Small accessories are not my bag, baby.

Monday, June 7, 2010

Saturday, April 3, 2010

have you met Gloria?


Gloria was my high school graduation present. She is a Uniquely You dress form. The concept behind her is that she is a foam body, so she has some give and squishiness like a human body, with a fitted dress cover. The dress cover you fit to yourself or whoever and make the adjustments and then zip the dress over the form. There are 2 sizes you need to choose: the size of the foam body based on your hip and waist measurements and the size of the dress based on your bust measurement. I am kind of between sizes. I bought a small foam body with the smallest dress cover size. I should have bought the petite foam body size with the largest dress size. Needless to say Gloria is much bigger than I am and has earned the nickname Fat Gloria. I have never attempted to actually fit the dress cover partially because time and an assistant is needed and also because I was never really able to get the cover on her, unaltered, in the first place.

I have since lost the fitting instructions but I called Atlanta Thread where I originally bought Gloria from and asked if it was possible for them to send me another instruction sheet. So one should be on it was to me shortly. And then we will see what happens. I know some of the corset makers have taken an electric knife to the foam body to reduce the waist more. Any sculptors out there who want to assist me with this project???

Wednesday, November 4, 2009

hmm...

I started making muslins for two different patterns that are essentially the same project. I have about 3 yards of navy blue pinwhale corduroy and I have been trying to figure out what to make out of it. I originally bought it to make a pair of wide leg pants but honestly I hate wearing pants and my wardrobe needs more fall/winter skirts. At first I thought just a simple A-line skirt with a center seam and the panels cut on the bias so they chevron in the center. But I wasn't really sold on it. Then I actually pulled out the material and it is much lighter weight and finer whaled than I had imagined it. I never really wanted a skirt anyway so I decided to make a jumper. The corduroy is so fine that not only can I not find the nap (I am slightly embarrassed to admit it) but it is almost like velveteen so I thought maybe a jumper that could be dressed up with snap in chiffon details and go cocktail hour. (a la the left)

Not really sure how that would work out so it is scrapped or at least on the back burner for now, mostly because I am on muslin number 2 and I am getting sick of it. I originally was making the Coffee Date Dress by Elaine May over on BurdaStyle because it was the overall shape and style I wanted and the pattern is free (so I don't have to buy it and I don't have to draft it myself). This was my first time using a pattern from BurdaStyle and while I think it is convenient and awesome that I can print a pattern at home it is sort of not convenient and not so awesome. There is a lot of taping and a lot of matching up things that don't exactly match and the trying to get it to print the right scale. Pluses and minuses, pluses and minuses. Back to the pattern I am mostly finished with the muslin except for a zipper to see if it does indeed really fit and I had decided to lower the back neckline. I was all settled on it. Then because of several other things going on that started influencing my every waking consciousness (more on this in another post) I remembered that I had this:

It is one of the two patterns I bought in July at my favorite shop. I had never pulled them out to check if they were complete. So I did that. And THEY ARE!! best $2 ever spent. So I decided to make a mock up of this jumper because I know the waist will need to be um...let out and it will need to be shortened by about 10 or so inches. I did the darts on the bodice and then I lost my sewing mojo. I just want it done already and what am I supposed to do with the muslins other than relegating them to the scrap bin? Then I read on Gertie's BurdaStyle Vintage Thursday column that women used to do tissue fittings and basted fittings because doing muslin mock ups is expensive and a more modern phenomenon anyway. Honestly I am always terrified that I will accidentally destroy the tissue if I do this but I think I am going to try it on this and then trace off the alterations onto kraft paper so I can still keep the original, original. And that is where I am now.

Thursday, October 22, 2009

Sewing: Summer Shirt


This shirt was made from the Summer shirt pattern in Downtown DIY Sewing by Alice Chadwick. I bought the book on sale because I liked the dress on the cover (which looks nothing like the photo of it on a person inside the book). I have several critiques of this book. First of which is that I think the instructions are poorly written and particularly confusing if you are a beginner and have no solid previous knowledge of how a garment comes together. And some of the instructions are just bad and could be made better very simply. For example the cuff piece on the sleeve is just a band folded in half lengthwise. The directions have you sew this folded piece directly to the right side of the sleeve and leave all the seam allowance hanging out. What?? Sew one edge to the right side of the sleeve and press the other raw edge under and stitch in the ditch. Also the seam allowance is 3/8 in or 1cm. That is tiny! Way too tiny to even comfortably finish properly. I bound the seams with seam binding as it seemed to be the easiest thing to do with out suffering severe burns on my hands. All in all this is my new favorite shirt and I do have plans to make one or two more despite the issues that I have with the book.

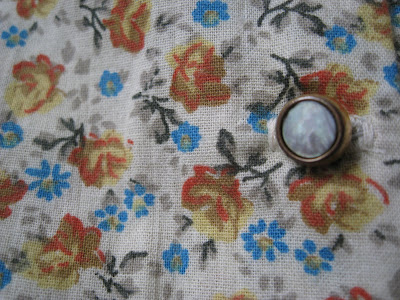
1 1/4 yd Floral Print Cotton, Vogue Fabrics, Remnant room, $4-5 total
Vintage buttons from Broadway Antique Mart

This is how I like to wear it. I have become very fond of wide belts worn at the waist.


And this is the muslin from it. I made it into a work shirt/messy shirt. it reminds of a french painters smock for some reason. You can see how it is wider at the bottom where i decided to take in the real version. I made the pockets out of the sleeve pattern. I shortened the cuff to the width i wanted for the pocket and removed the sides of the sleeve and adjusted some of the gathering so it was less full. 2 shirts for the price of one!!!

Friday, July 31, 2009

A Guide to Better Sewing

I am in love and obsessed with Gertie's New Blog for Better Sewing. The idea is based on this book from the 50's

which claims to be able to make you a better seamstress one project at a time. There was a line of patterns that corresponded with the projects in the book but were sold separately. Gertie has tracked down some/most of the patterns and is sharing her experience of working through the book and use of sewing techniques from the 50's (copious tailor tacks and hand overcast finished seams, anyone?).
The thought that i probably do not have to add for those of you who have been on this blog before or who know me even just a little bit is: I TOTALLY WANT TO DO THIS. I am generally not as much of a fan of the 50's as the 30's and the 40's (the huge skirts are fun but not so practical, same with the wiggle skirts) but the pattern's in the book and the projects of Gertie's that she has posted on the blog seem really nice and fairly practical. i love the portrait collar blouse, the background dress and of course the evening dress. The bow tie blouse and the shirt dress are of course classics. And initially not really taken with the slim skirt until i read Gertie's post about her slim skirt where she talks about the construction of it, now I want to make one whether or not it is flattering. The skirt is made with only one yard of fabric and has only one seam, up the back, and it is shaped only by a the series of pleats at the waist line. it is the vintage construction techniques that really get me. That is what I really want to learn. (and more on that later)

In other news, I am trying really hard to post something every week. Thursday seems to be the day with the exception of this week. i mostly have bits of vintage stuff i have found to show you as my own sewing has been a bit off and going slowly right now. I did pick up the green sweater i was knitting again and have just about completed the body and will start the sleeves soon-ish. I did sew up a dress a couple weeks ago but i broke one of the straps on it during our last trip and need to mend it. I will hopefully post that for you next week. I have also been working on the muslin for a shirt and it is going really slow. it has been hard to find my mojo in my new sewing studio. it is cute button down with short sleeves and gathering along the yoke. i think I want to make a shirt dress out of it too.

So in lieu of photos this week go check out Gertie's blog and report you thoughts back to me!

Thursday, July 16, 2009

Jules and Suzanne

Jules and Suzanne run my favorite little antique/vintage shop. My Dad and I used to go in there all the time but since i have moved out of my parents house and the shop is not very near my new home and we all have crazy schedules we have haven't been there in awhile. Like years. We went a couple weeks ago since Dad had a day off. We decided to go antique-ing together, we were looking at treadle sewing machines. Jules and Suzanne did not have a sewing machine but we had to go anyway. We lovingly refer to them as "The Girls". Suzanne wasn't there when we went but Jules was (as well as Jackie, Jules' little dog) and upon entering we received a cheerful greeting followed by a "I haven't seen you in awhile". I had been wondering if we would be remembered or not. We used to shop there a lot but not all the time and we usually bought stuff. Its a hard store to walk out of empty handed. We were there for over an hour digging through everything. The store is very literally packed and you never know what you will find. My grand total was about $13. here is what i brought home:

Paris Scarf, Silk I wore it the other day. I really like scarves. I just usually don't know how to wear them.

Button-er, I have no idea what these are actually called. i think I am going to start collecting vintage sewing/dressing implements. Because I need another thing to collect.

Patterns. I have no idea if they are complete or not but they were $2. The shirts in the 60's pattern have a separating zipper all the way down the back. My first thought is "Is that neccessary? can I change that to a shorter zipper?". My second is " Ouch, if you are sitting in a chair with a back".

And they have a huge selection of buttons. So i am starting there next time I need buttons even though it wil be an hour nad half trip on public trans... but the perfect vintage buttons are always worth it!

Sunday, February 1, 2009

the tartans and plaids discussion continues...

I actually finished this bag before christmas but I put it to use right away and the holidays were kind of busy... I am incredible pleased with it even though it looks exactly like my high school uniform! I picked up the fabric when I bought the fabric for the Homely Heroine dress. I will post about that shortly and it is next on my sewing list. The fabric is a poly/rayon blend. Not my first choice but it does have nice drape which is good for a dress. The bag is pilling a bit where it rubs against my coat but it is holding up well otherwise and I put my bags through lots of abuse. It is lined in a forest green and I added a big divider type pocket and some organizer pockets on the inside. I like the design so much i want to make another one. I am thinking a snakeskin print interior design fabric so it is a little more sturdy and more season neutral. I really like snakeskin bags. i need to make a few adjustments to the pattern and construction so it is a little simpler to finish but other than that it came out perfect on the first try (though my plaid matching is a little off).

Please click the title of this post for more information on tartans and plaids. The plaid here is Black Watch.

Friday, January 30, 2009

the tree dress, finally, and a bit of disappointment...


I started this dress back in April and I just finished it last week. It has been a long and harrowing experience. I finally got the muslin to a place that i liked and altered the pattern and then finally got around to cutting out the fabric maybe 3 weeks ago and started going and realized that i hadn't referenced my little sketch before i cut and had to recut a few pieces. Then i had some guests and it got put on hold again. Then I finally finished it.

And I don't like it. The top part is still too big and it looks funny on. Bryson thinks it is because the feel of the dress is more feminine and the fabric is more stark and sort of structured. And on me the proportions are off. The black makes the top half heavy and while i like the length on me it is almost too short to compete with the top. I have some ideas on how to make it look better and i want to take in the top half but not right now. It is going to sit in my closet while i work on some other things before i come back to it.
I had such high hopes for this dress. sigh. oh well...at least i have a new black sash.

I have another dress idea that I want to work out the pattern for and I would like to make myself some handkerchiefs. Right now I am taking a sewing break and working on some knitting that has been hibernating awhile.